Pick your assistant under Step by step below. Each tab has its own screenshots. The EzFlow
address is always the same:
https://api.ezflow.my/mcpWhere connectors live in each app
Claude
Settings, then Connectors.
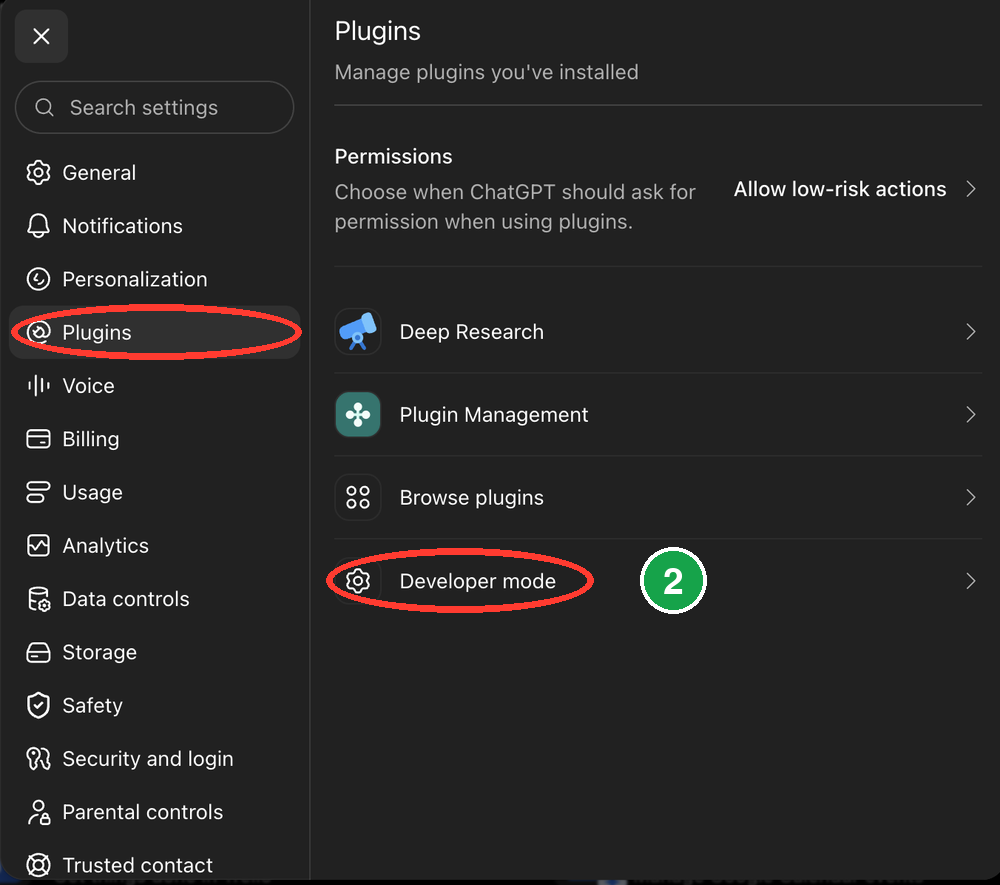
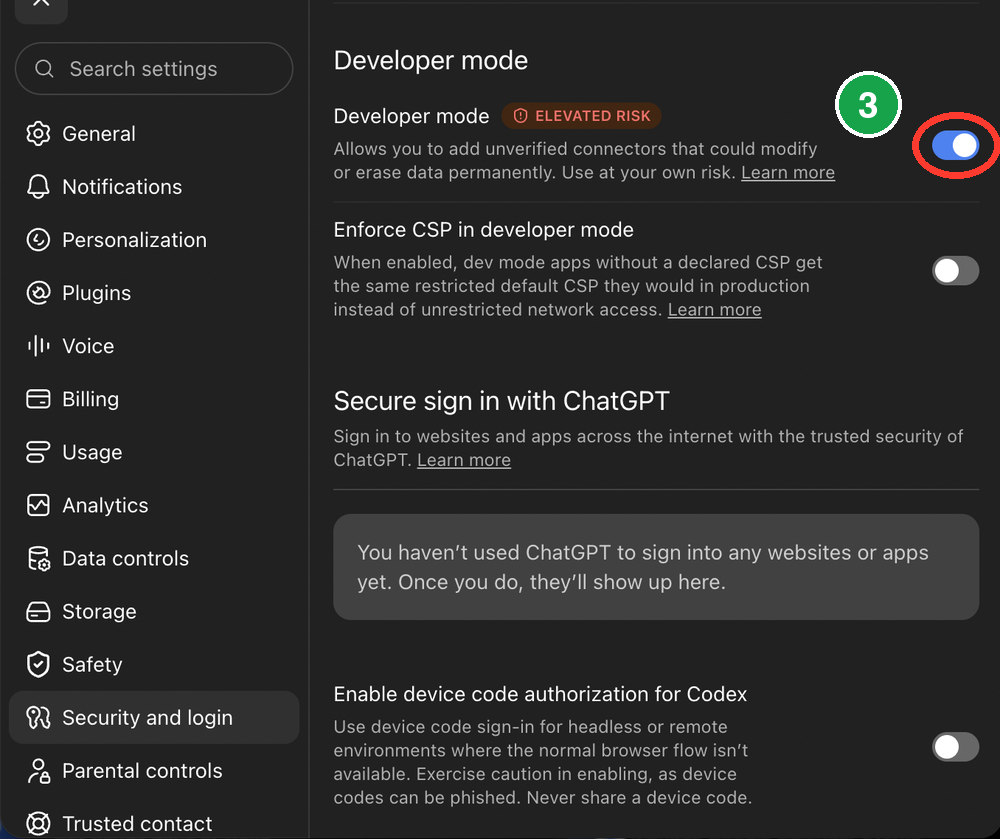
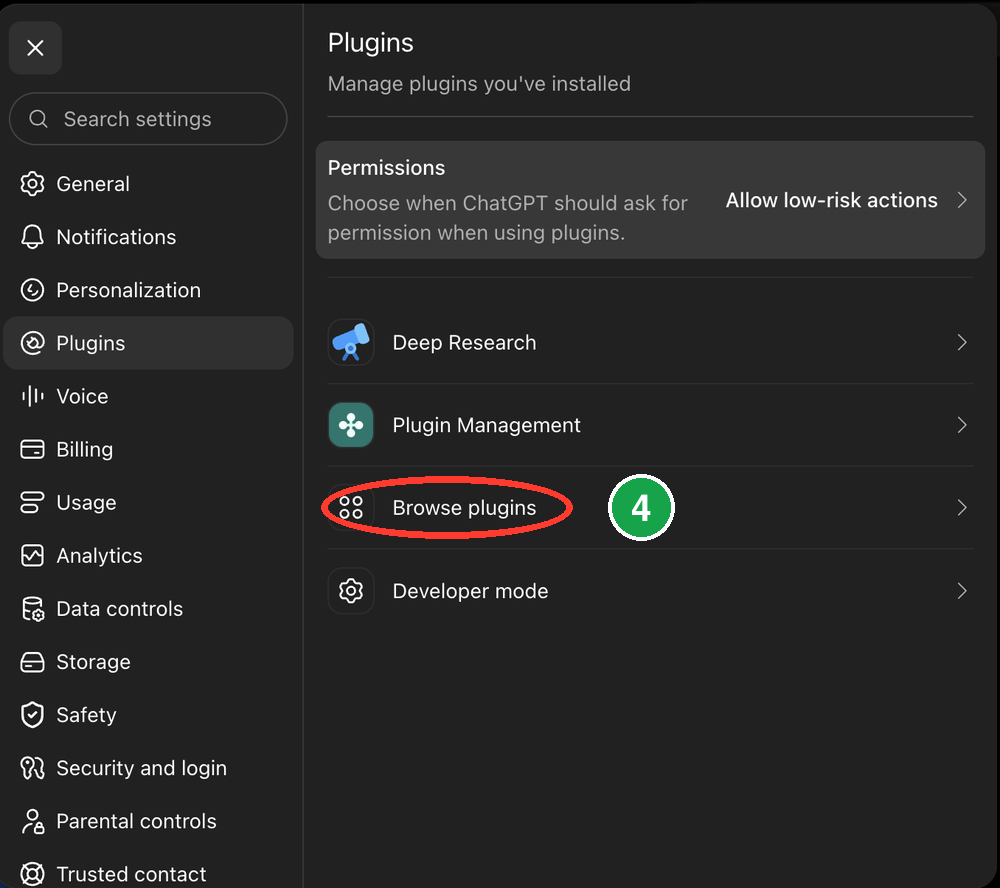
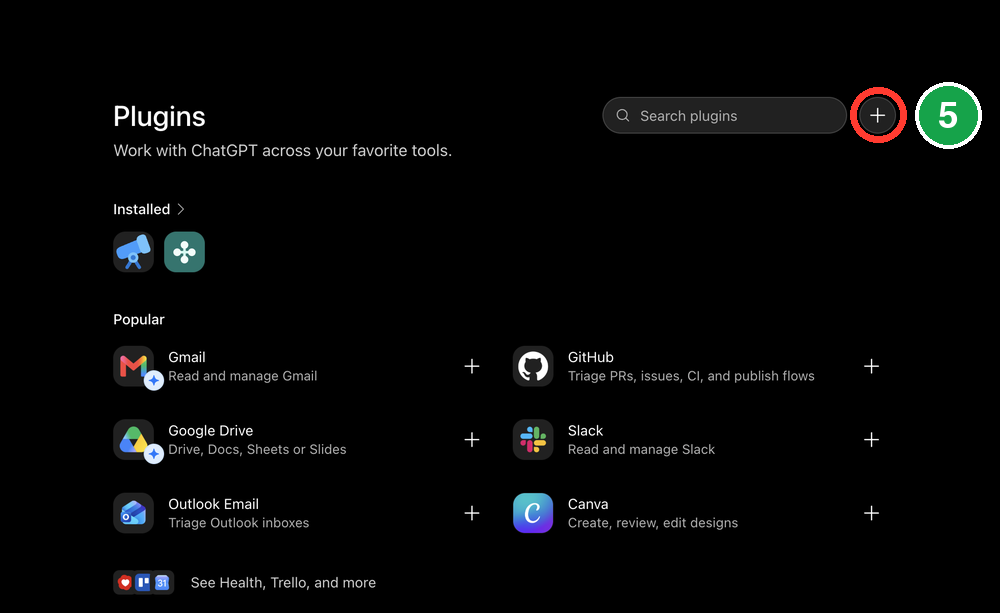
ChatGPT
Settings, then Plugins, turn on Developer mode, then Browse plugins and +.
Claude Code
Run
claude mcp add --transport http ezflow https://api.ezflow.my/mcp, then type /mcp.Before you start: open your assistant app on your computer, and be ready to open your business
email to read a short code.
Step by step
- Claude (web / desktop)
- ChatGPT
- Claude Code
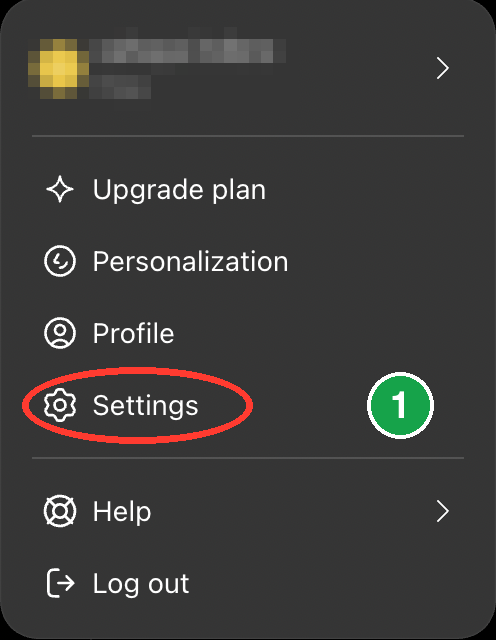
1
Open your assistant settings
Open your AI assistant app and go to its Settings. Any assistant that supports connectors
has the same option in its own menu.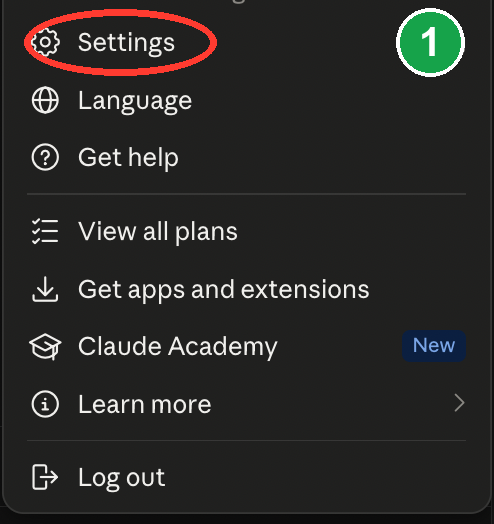
2
Find Connectors, then Add
Go to Connectors (some apps call this Integrations). Then click Add to add a custom
connector.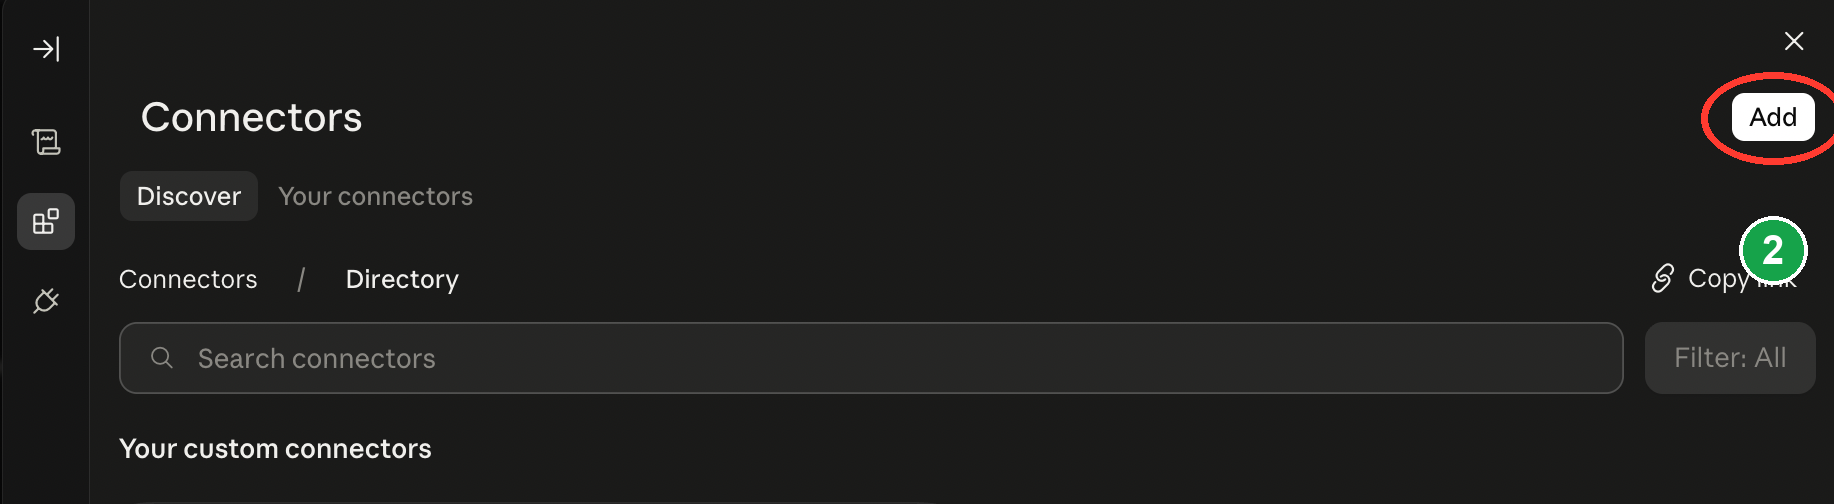
3
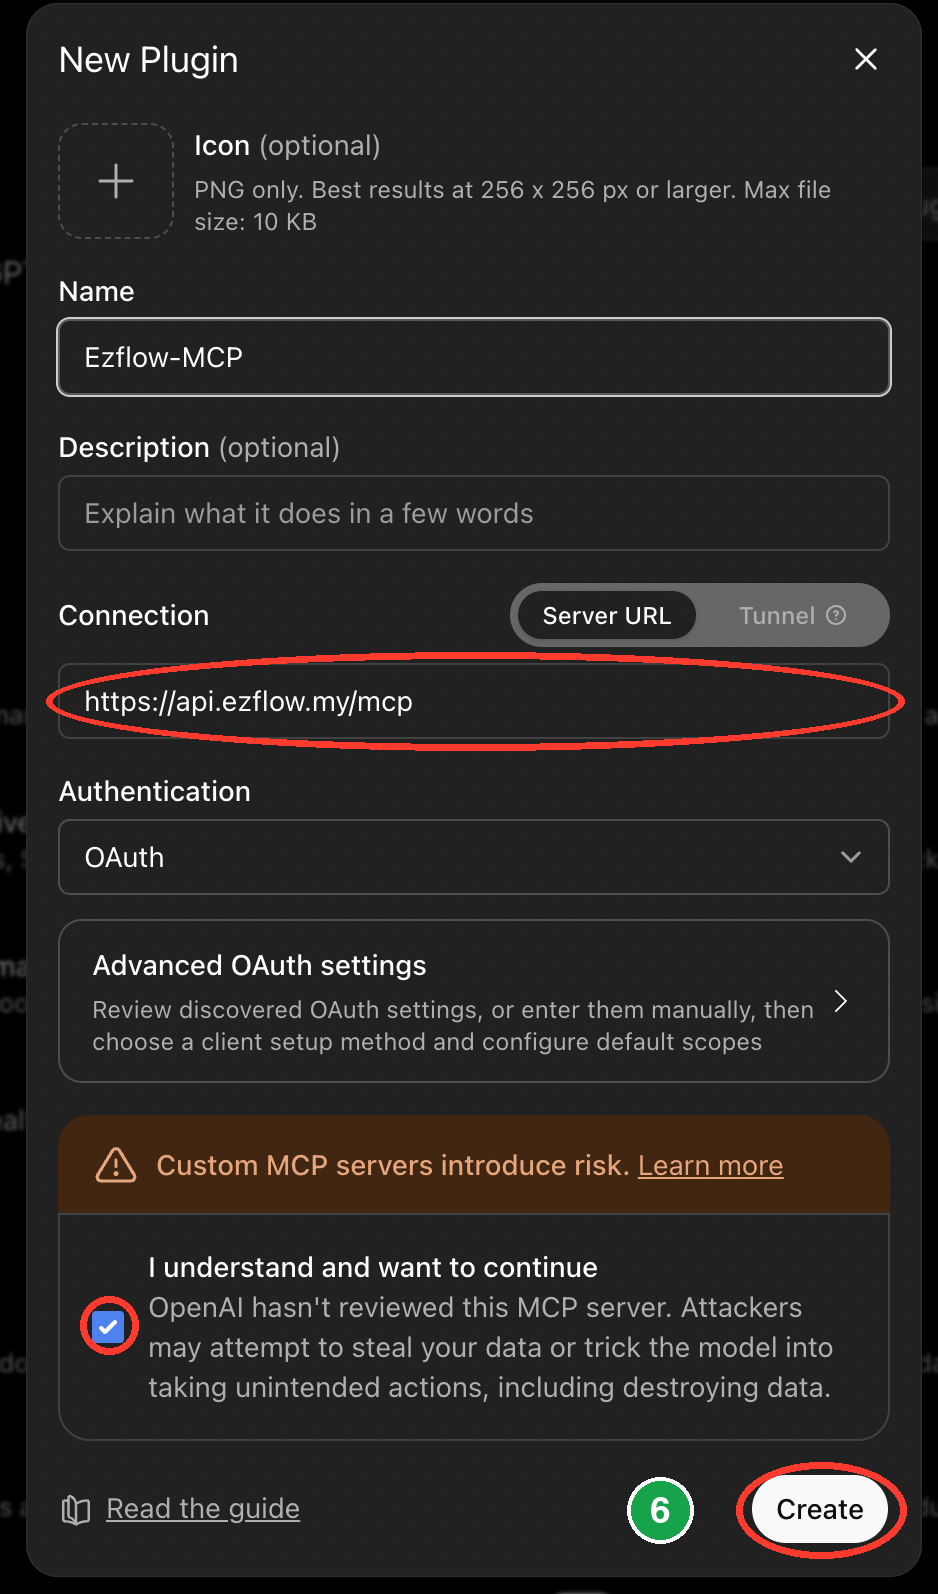
Type the EzFlow address
Give it a name like Ezflow-MCP. In the address box, type exactly 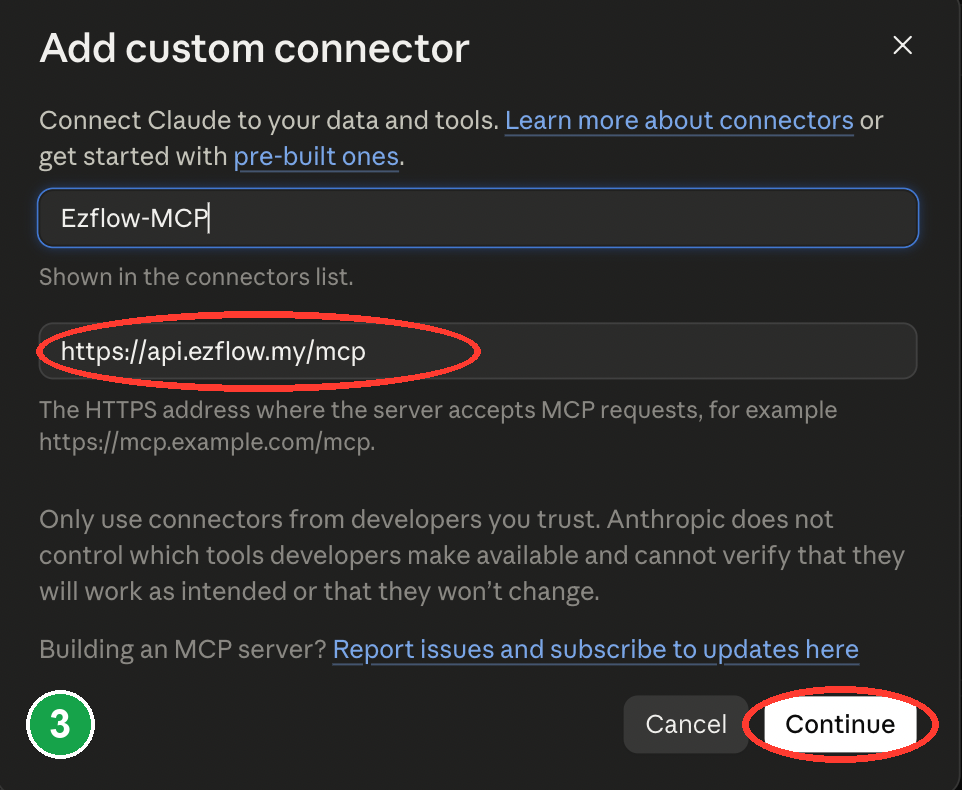
https://api.ezflow.my/mcp,
then click Continue.4
Keep the default settings
Do not change any of the choices on this screen. They are already set for you. Click Add or
Save.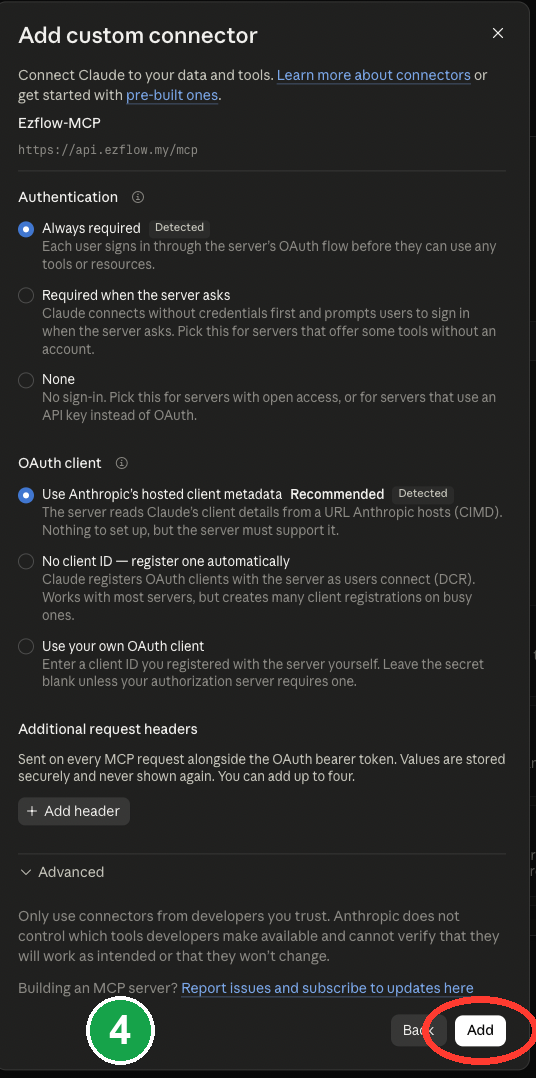
5
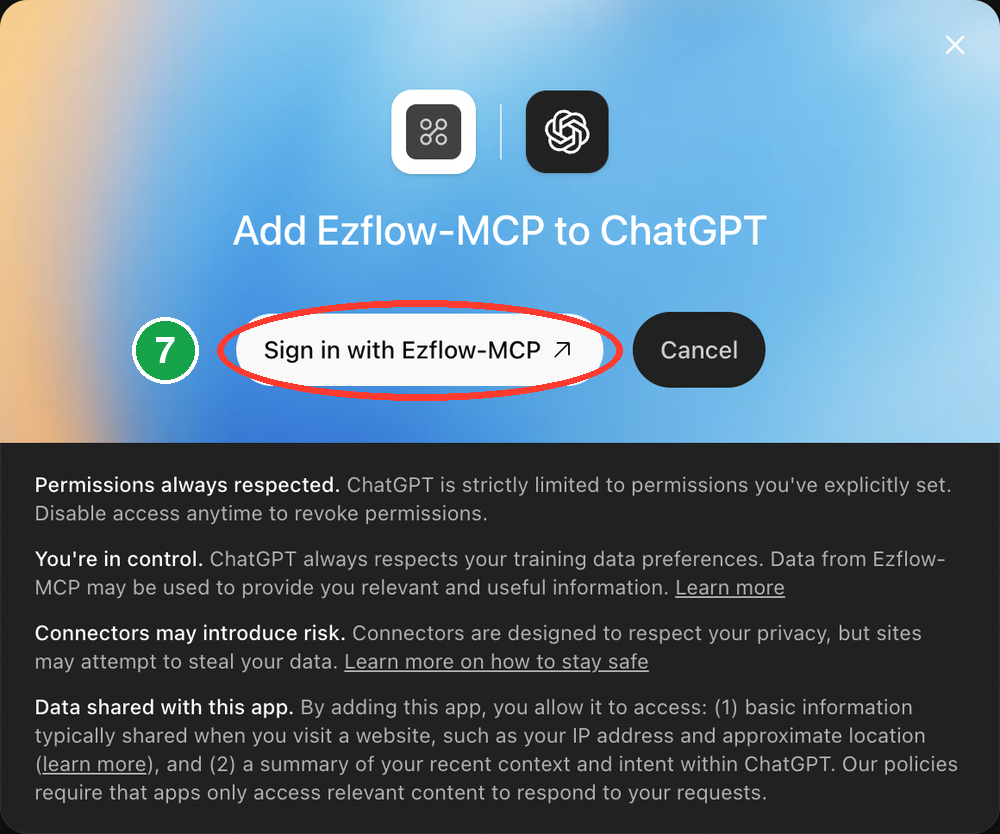
Start the sign-in
Click Connect. Some apps call this Sign in or Authenticate. This opens the EzFlow
sign-in page.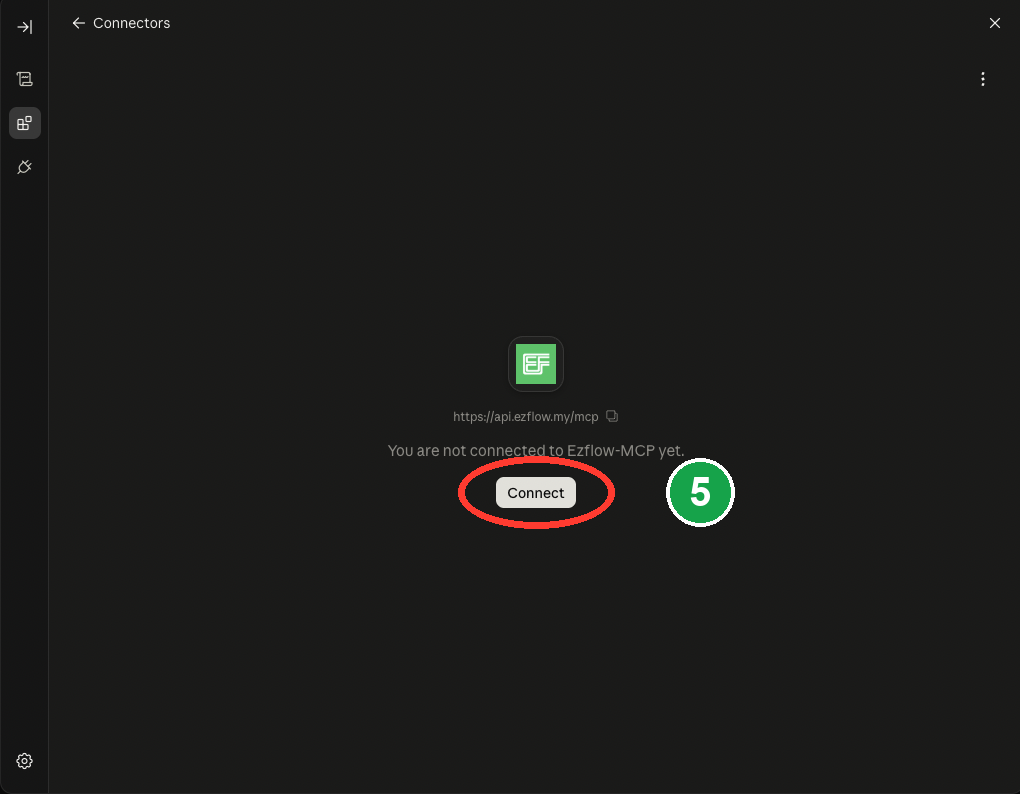
6
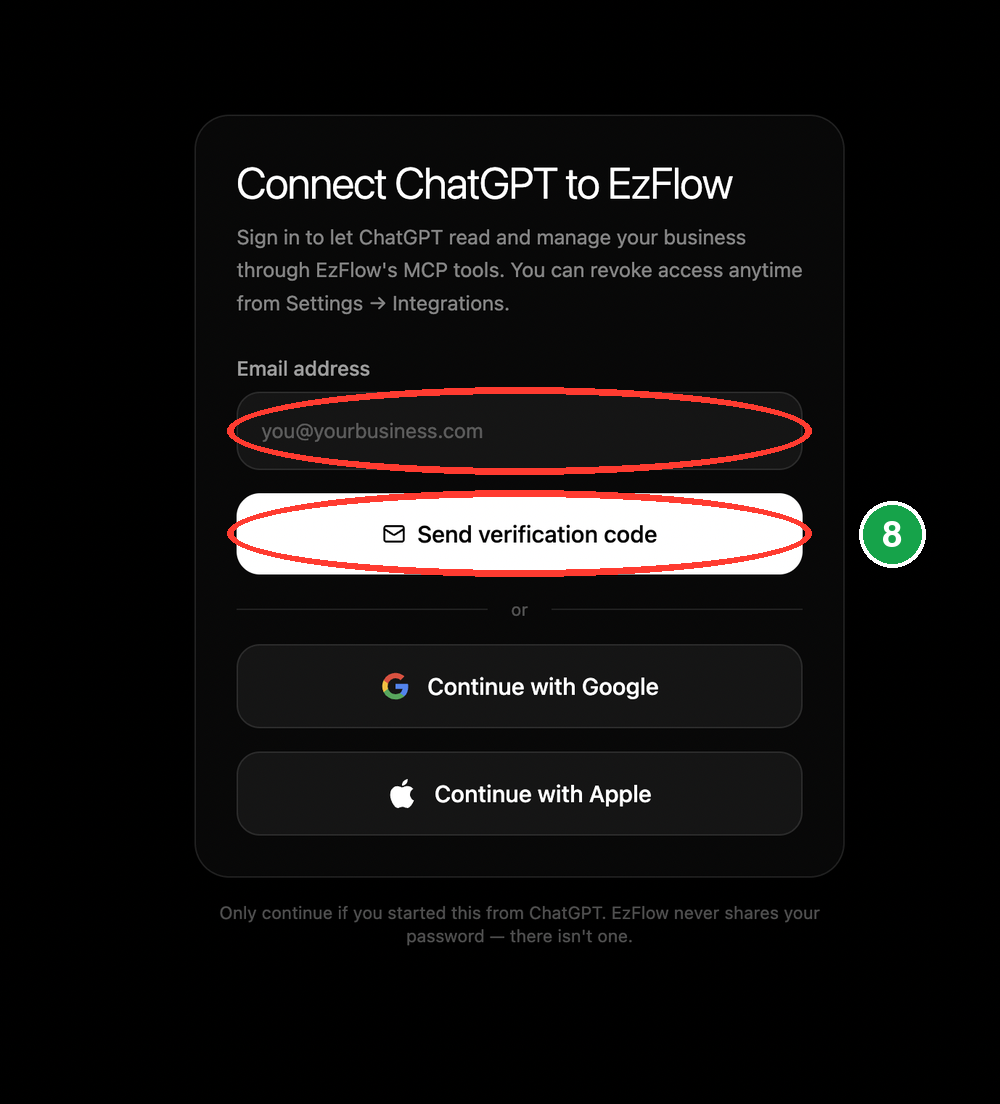
Type your business email
On the EzFlow sign-in page, type the email you use for your EzFlow business, then click Send
verification code. You can also use Google or Apple if that is how you sign in.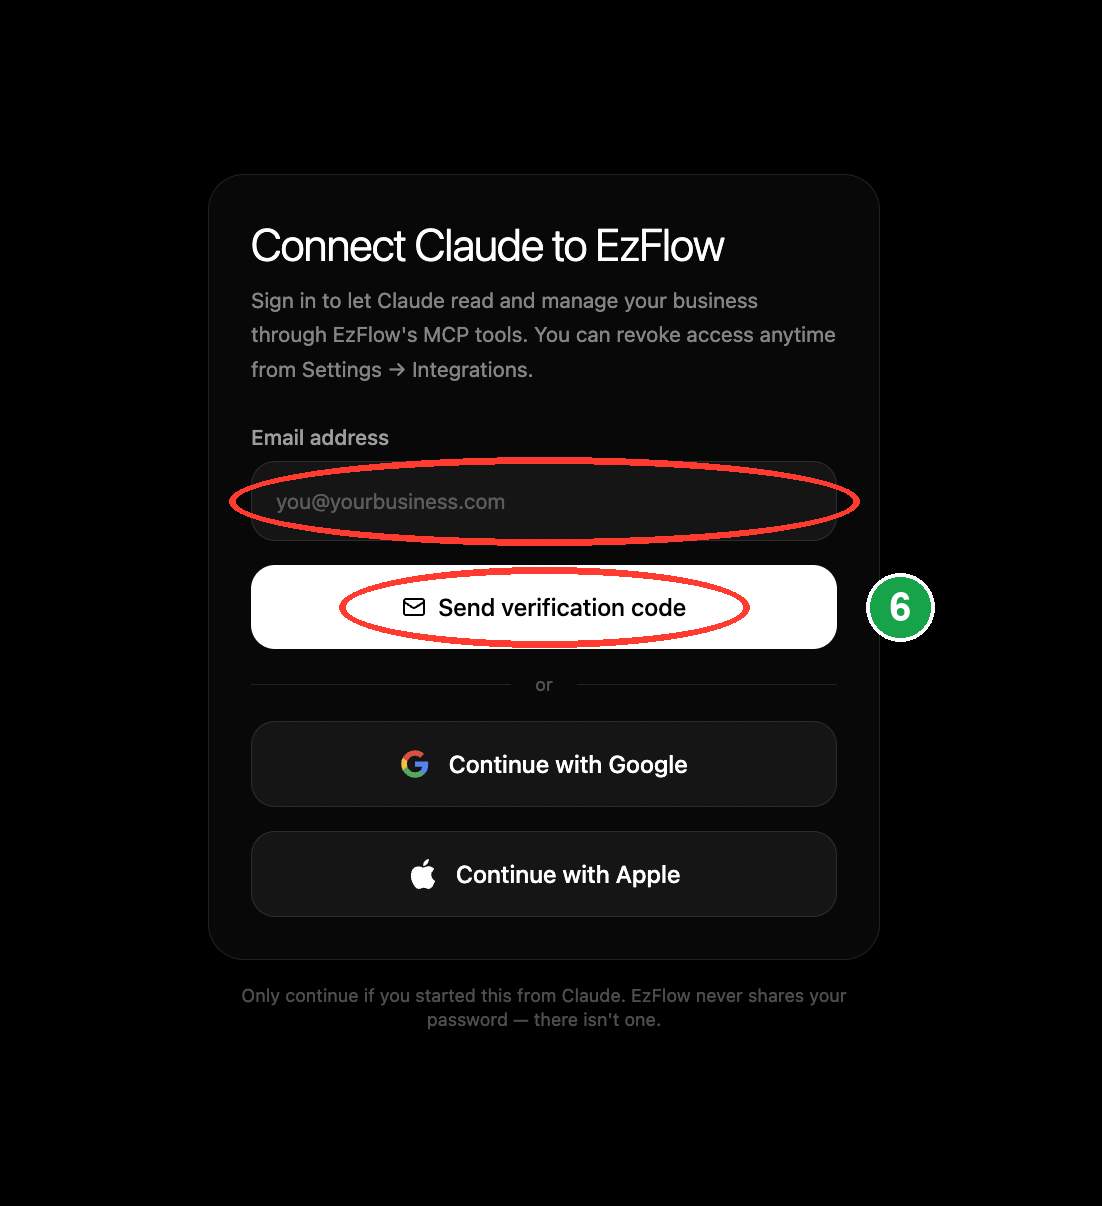
7
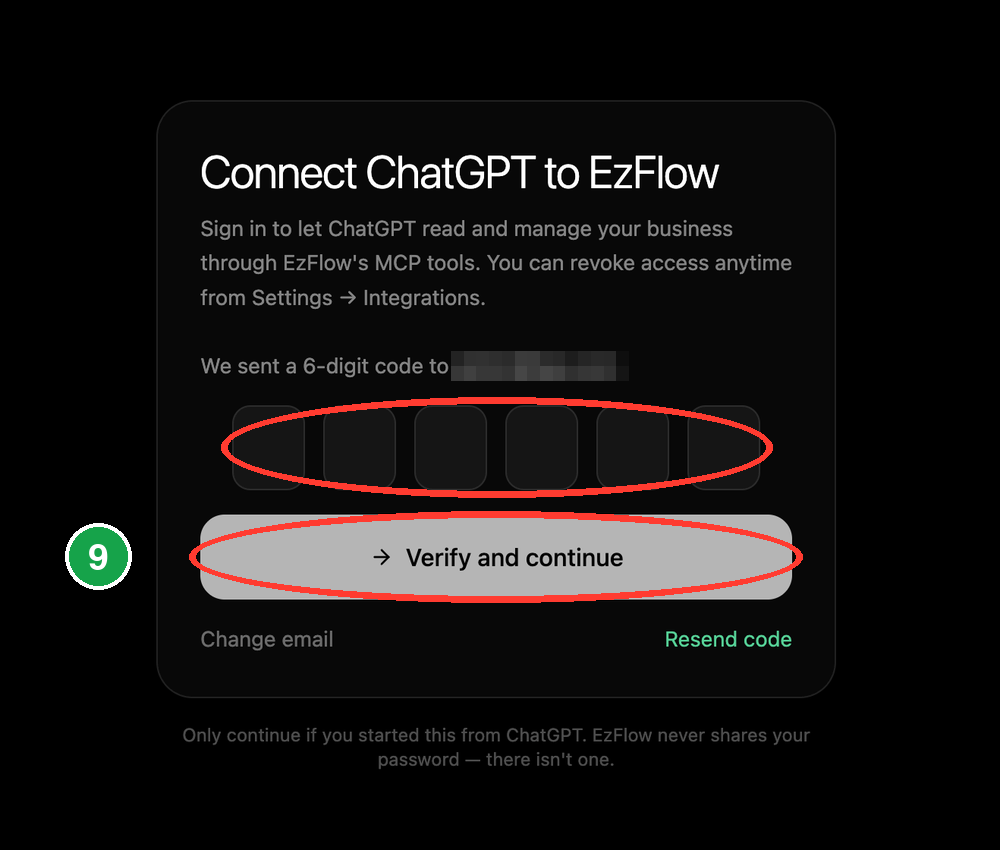
Enter the 6-digit code
Open your email inbox and find the 6-digit code from EzFlow. Type it into the boxes, then click
Verify and continue.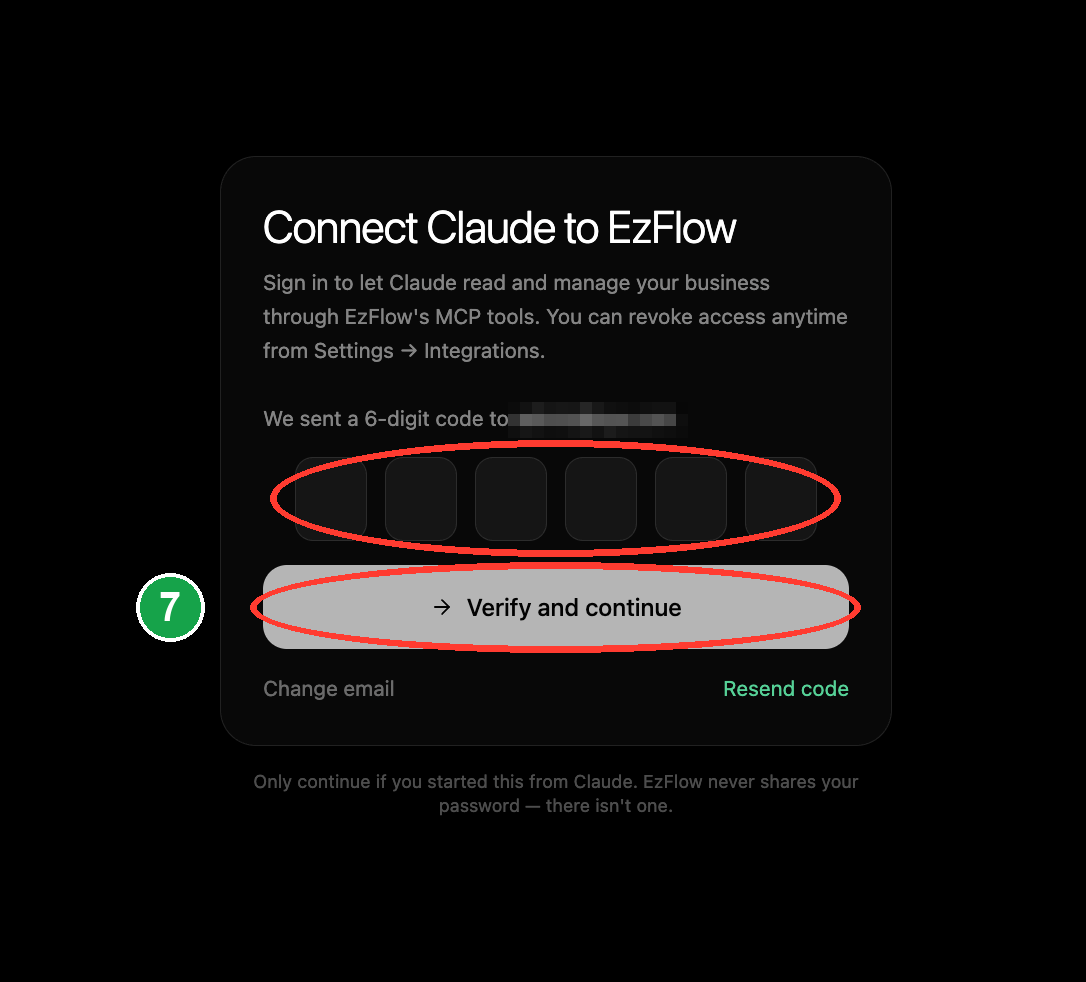
8
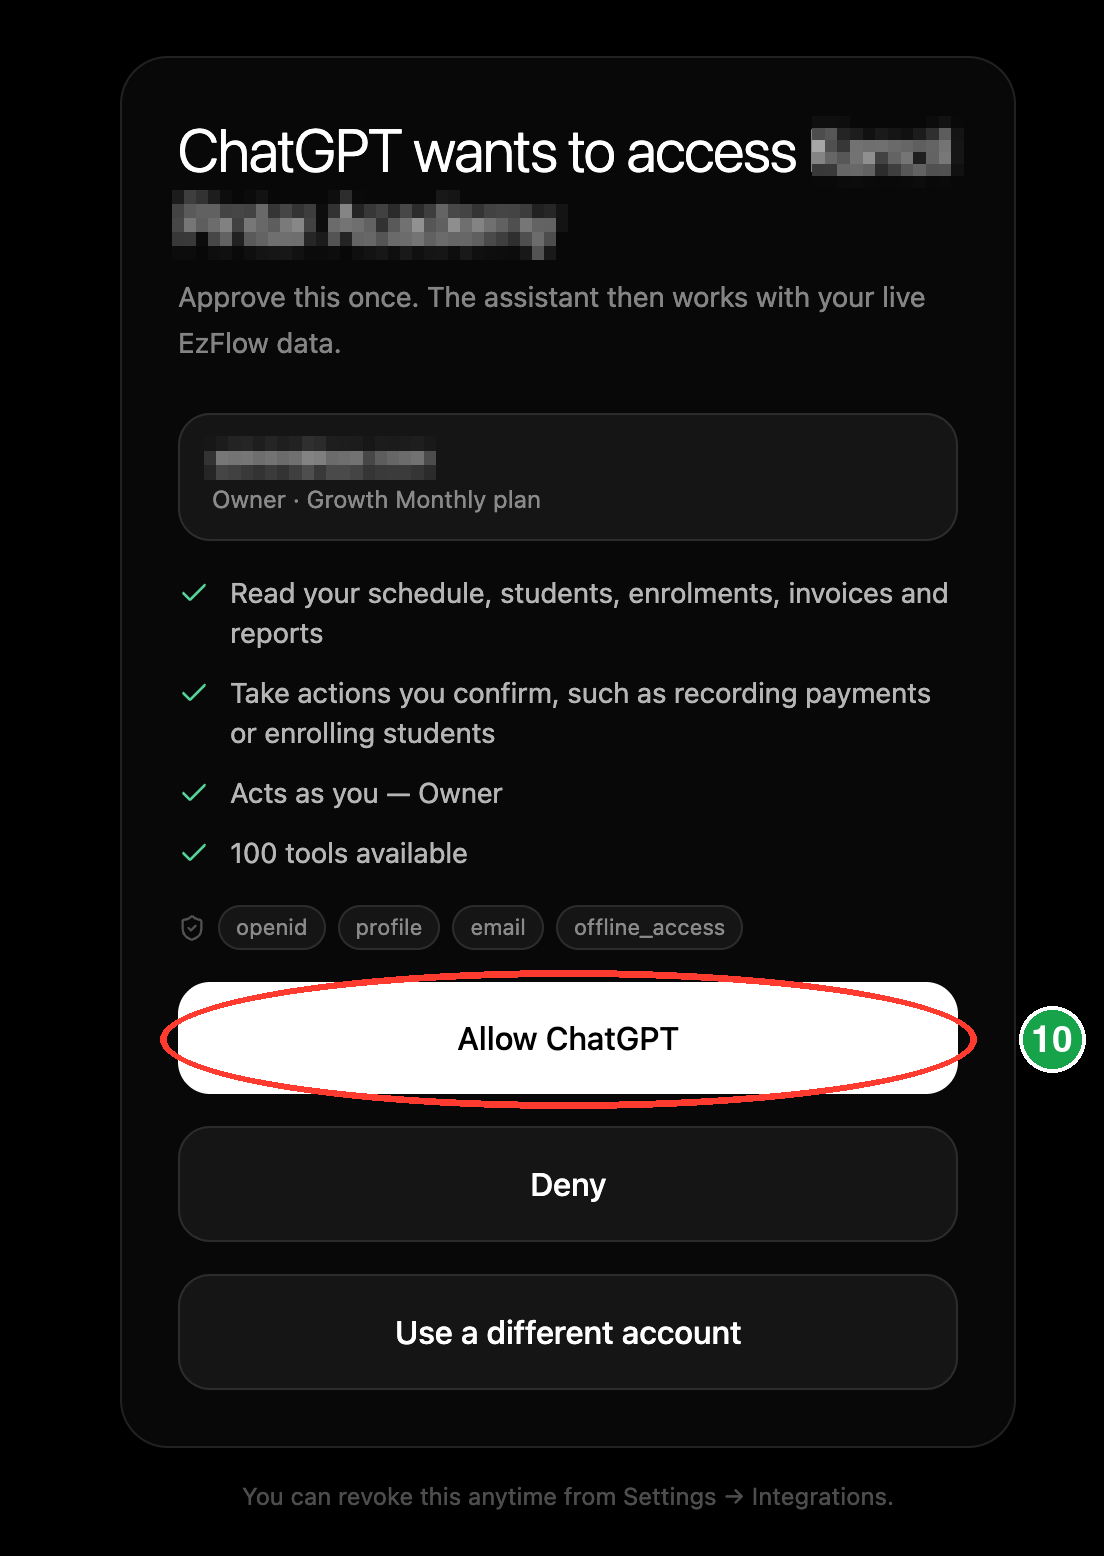
Approve access
EzFlow shows what the assistant will be allowed to do. Check that it shows your business and your
role as Owner, then click the Allow button. This is the step that grants access.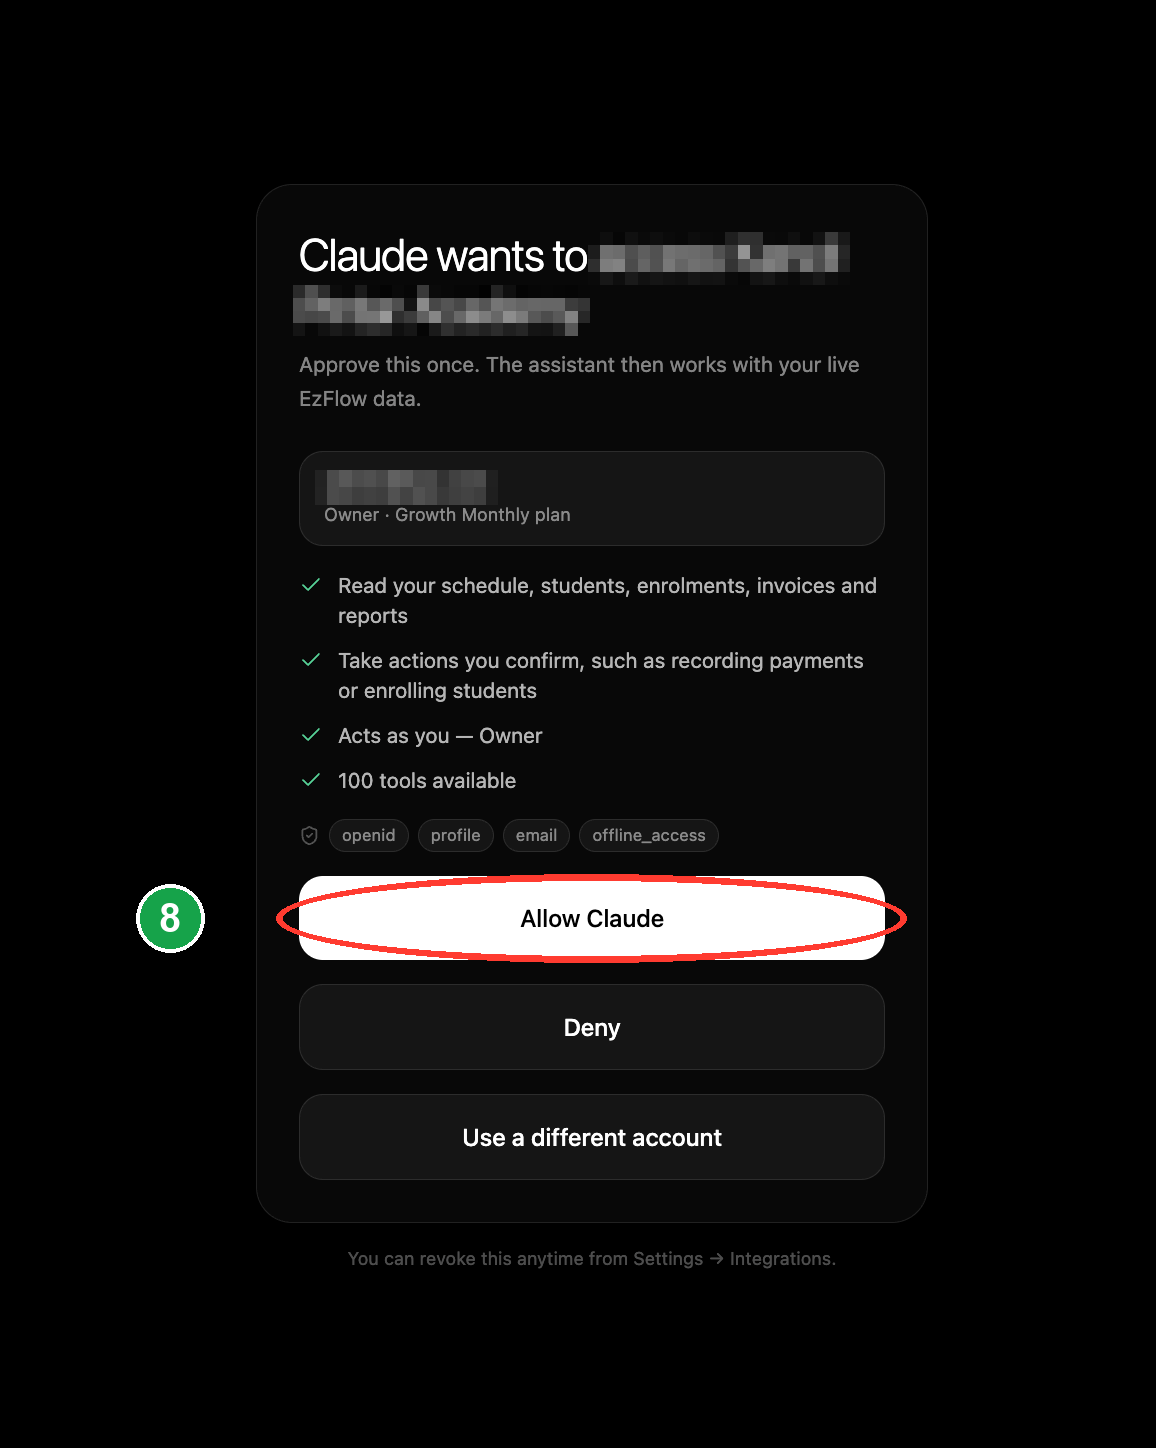
9
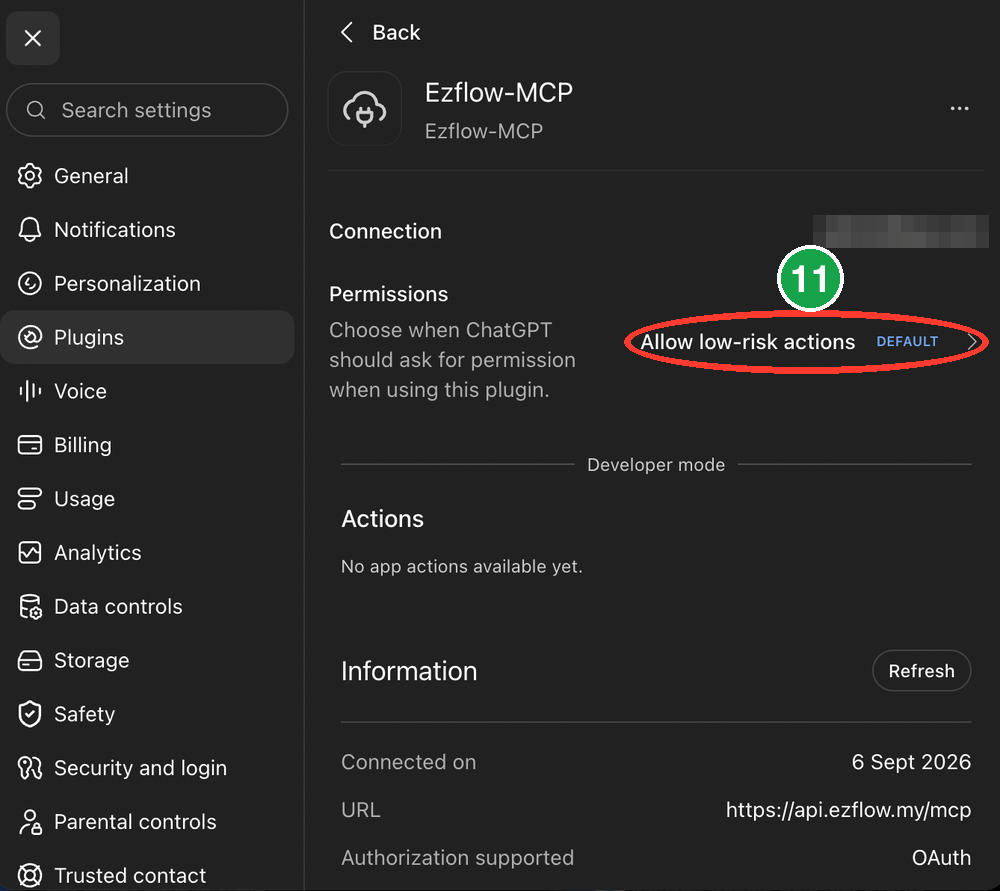
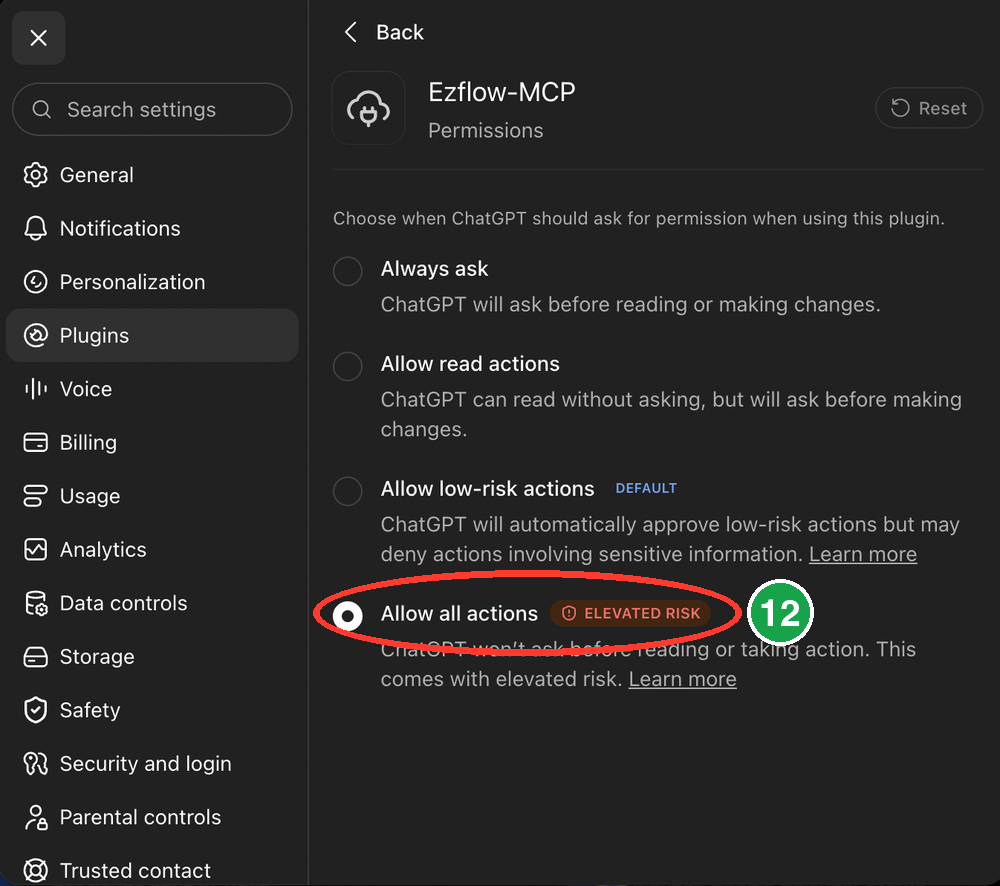
Optional: stop the pop-ups for read tools
If your app offers it, set the read only tools to Always allow so the assistant does not ask
you every time it looks something up. You can leave it asking each time if you prefer.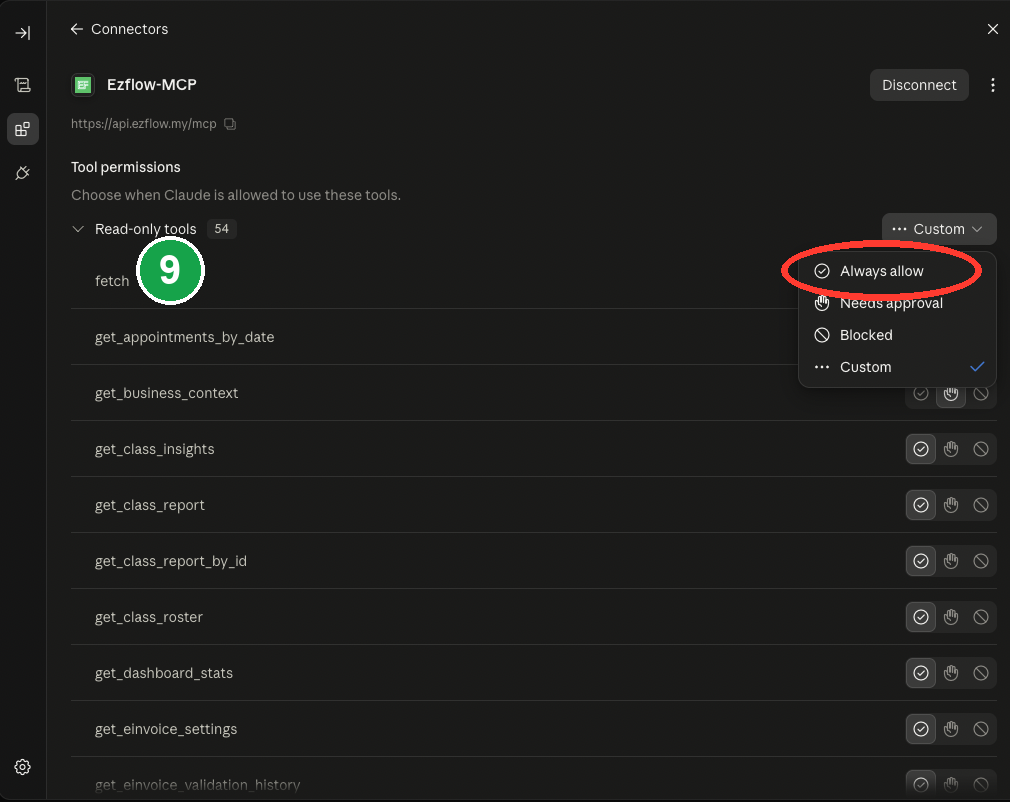
10
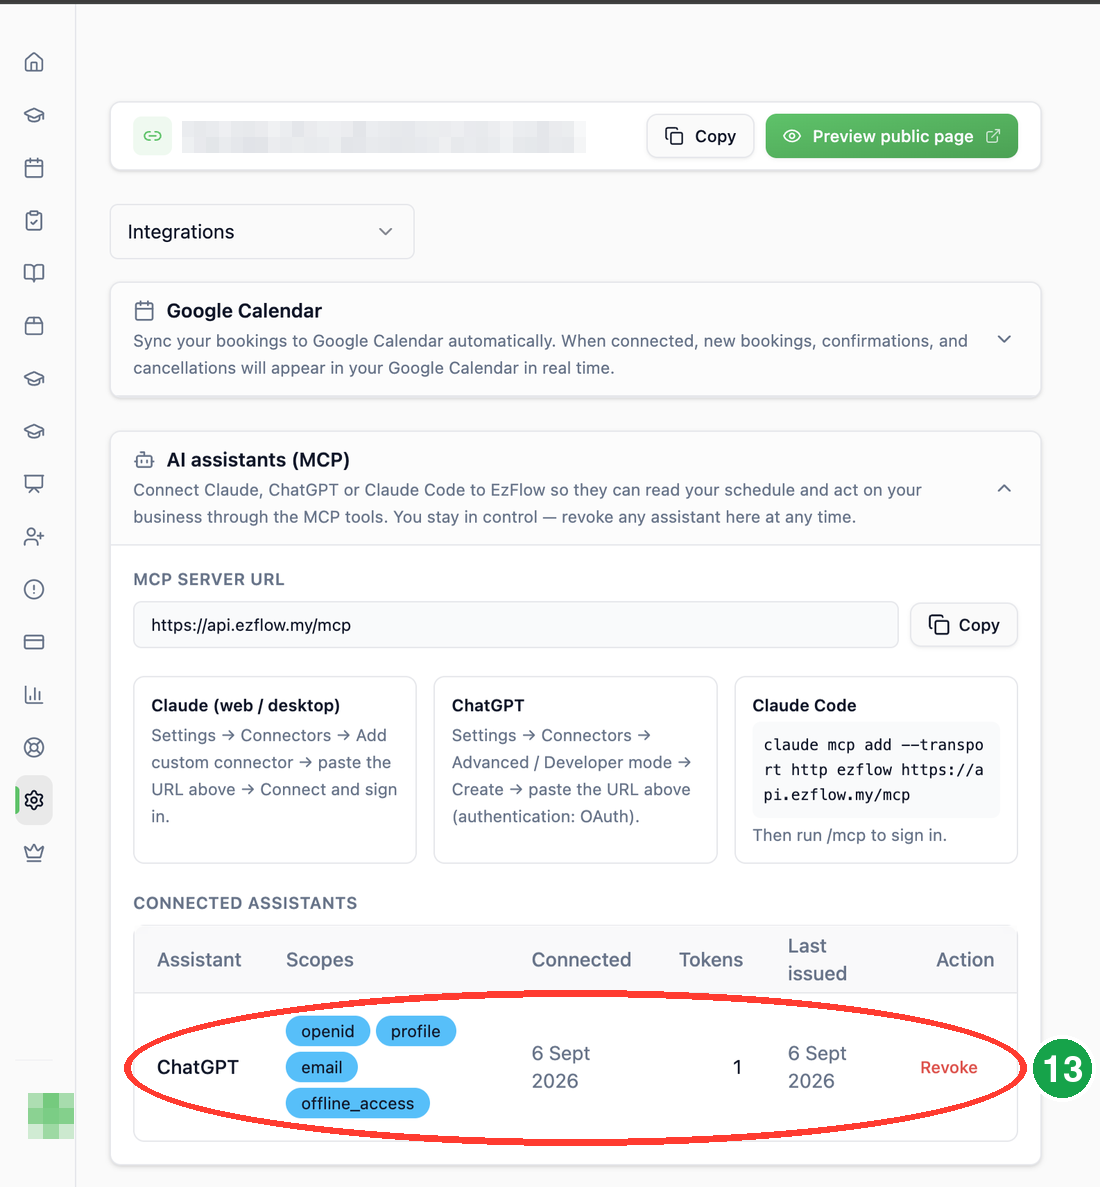
Check that it worked
Open EzFlow and go to Settings, then Integrations. Under AI assistants you will see your
assistant listed as connected. To stop it at any time, click Revoke here.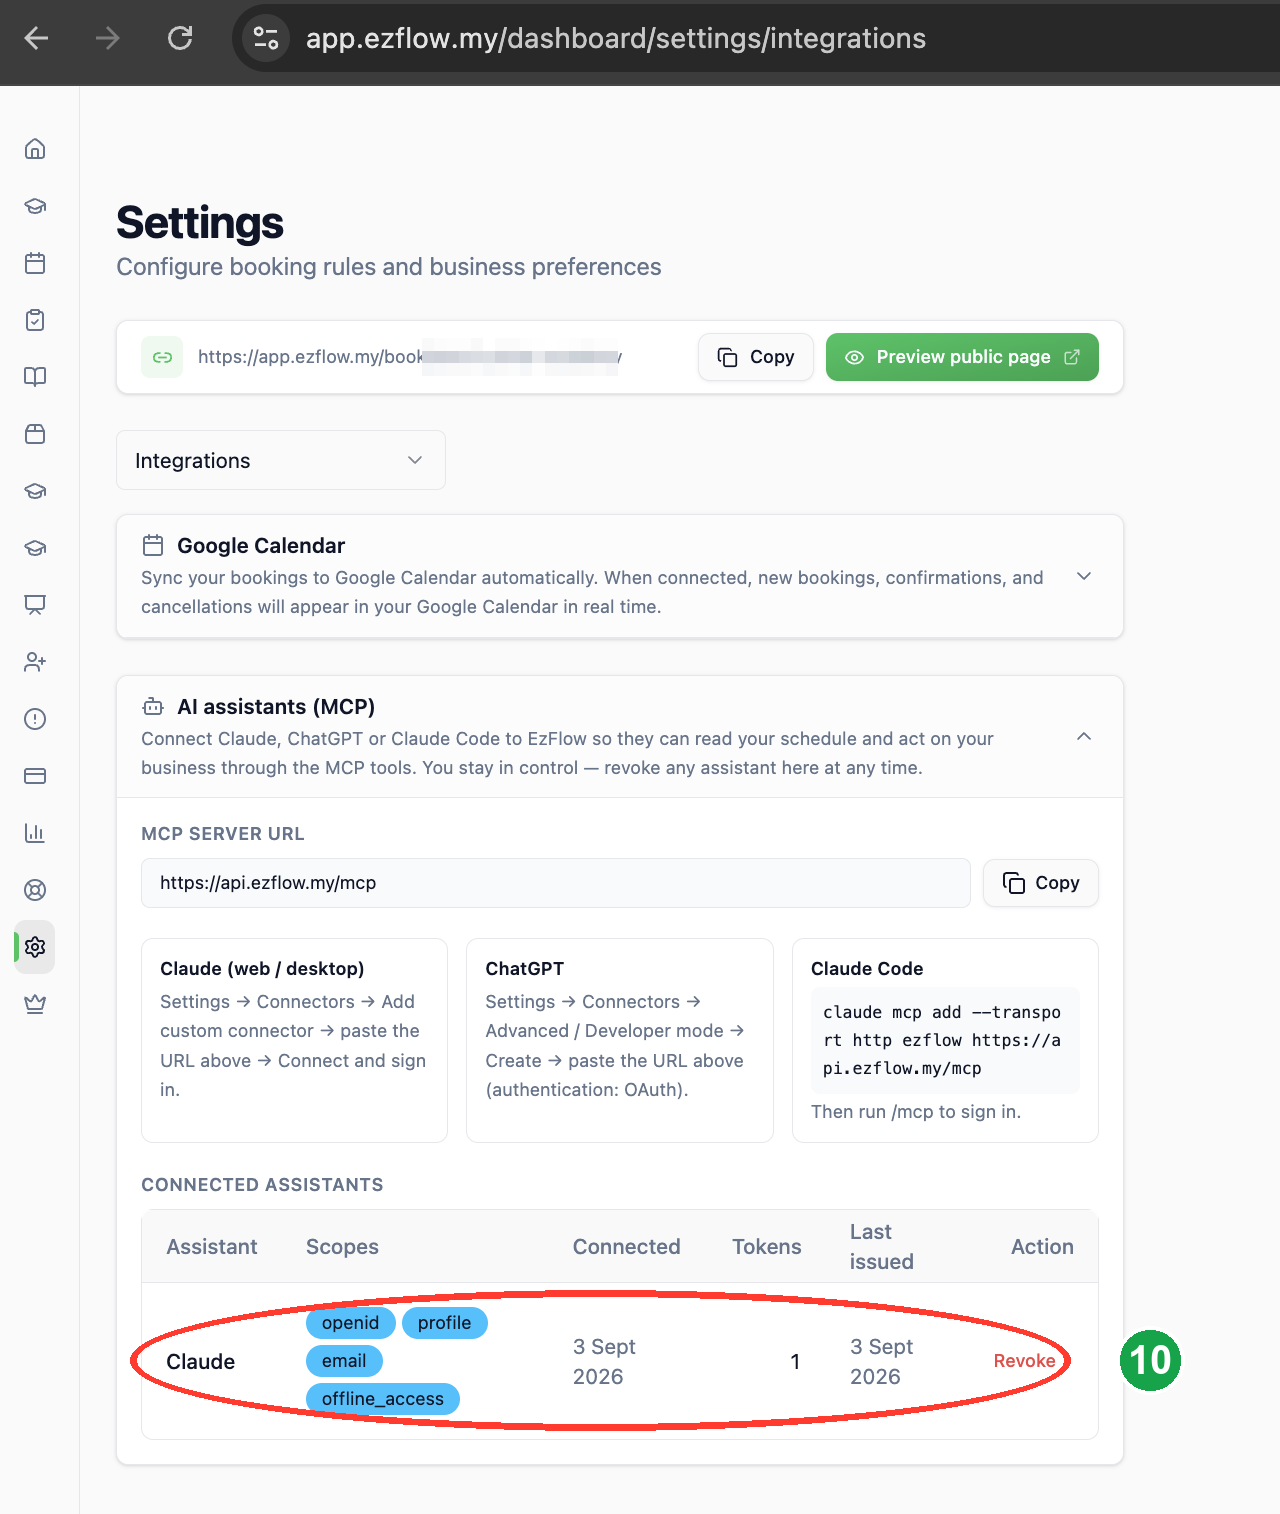
You are connected
Go back to your assistant, start a new chat, and try something simple like “show me today’s classes” or “how many students are enrolled”.WhatsApp marketing from your assistant
Everything in the Marketing module can be done in plain words. Some things people ask:- “How many credits do I have and what is my sending limit?”
- “Draft a marketing template that offers 20 percent off the September intake, then submit it for review.”
- “How many customers would a campaign to everyone who has not visited in 60 days reach, and what would it cost?”
- “Create a campaign called September promo with the approved template for that audience, and launch it now.”
- “Pause the September promo.” “Resume it.” “Cancel it and refund what is left.”
- “Show me the report for the last campaign.” “Who replied?”
- “Set quiet hours to 9 to 8 and cap marketing at 300 credits a day.”
- “Add +60123456789 to the do-not-message list.”
- “Switch the second number to marketing only.” “Send a test message from it.”
- “Update the about line on my second number to Fresh bakes daily in Bangi.” “Copy my main number’s profile to all my numbers.”
- “Show me open WhatsApp conversations and reply to the last one.”
Is it safe?
Yes. You sign in and approve access yourself, and you stay in control:- You approve access once, and any action that creates, changes, pays, sends or deletes is restated to you before it runs.
- You can revoke it anytime from Settings, then Integrations in EzFlow.
- Your plan decides what it can do: reading is on every plan, and making changes needs Growth or higher.
- EzFlow limits how fast an assistant can call the tools and watches for unusual activity, so a runaway or misbehaving assistant is stopped automatically.